EZClaim Premier makes extensive use of Grids. Grids are very powerful and allow you to expand or streamline the data visible on your screen.
Grid customizations are stored differently depending on whether the program “recognizes” you by your Premier Username, Cloud Login, and/or Windows User Profile.
Q. If I add a column, will it still be there when I log back on?
A. Yes, as long as your login process (see above) is consistent!
Q. Why didn’t the columns I added during a recent session carry over into a fresh session?
A. The program may have closed out unexpectedly due to one of the following reasons:
•A forced logoff from the server
•A program crash
•A program timeout
Q. I’ve had certain columns in place for quite a while now. Why have they suddenly disappeared?
A. Activating the User Authentication feature in Premier overrides any existing user (except ADMIN) preferences.
NOTE: If an ADMIN user has created users under ‘Manage Security Settings’ these settings are user-specific as are any ‘Save Layout’ buttons created. (Widgets are company file specific and are thus available to all users.) For the best user experience, EZClaim recommends setting up User Authentication and avoiding shared logins.
.
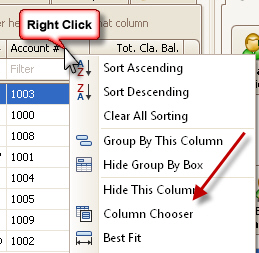
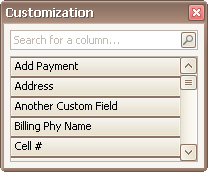
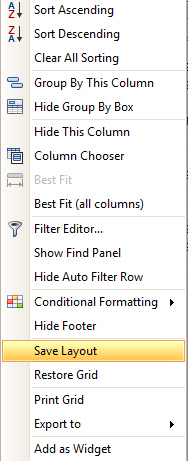
The ‘Column Chooser’ enables the user to add or remove columns from the data view. Most Column Chooser (also called Customization) popups have a search field to help find the correct column. To show the column chooser, right click a column heading and select Column Chooser.


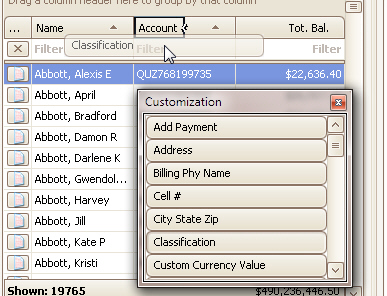
Add – Drag and drop columns into the header area at desired location.
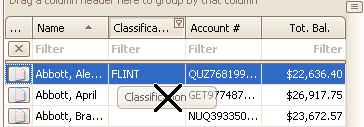
Remove – Drag and drop a column outside the column heading area to remove it.
Restored – If you need to reset the grid to the original settings, right click any of the column headings and select ‘Restore Grid’.

If a user is manipulating a grid in the Find screens, they have an additional option of saving a layout. Right Click on any column heading to save all the settings of that grid. A new button will appear at the bottom of the grid enabling the user to return to this layout whenever needed. Find screen layout buttons can be moved from left to right across the bottom of the grid and deleted at will. This is useful if a user frequently uses the same grid settings.

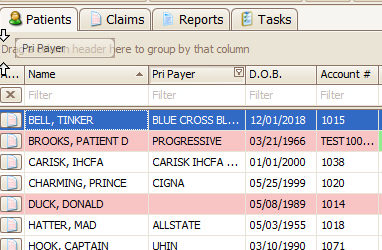
Group Drop Zone – The shaded area above columns in the QuickAccess tabs (Patients, Claims, and Tasks) allows you to ‘Drag a column header here to group by that column.” For example, on the Patient tab, you may find it helpful to group by Primary Payer. Multiple columns can be grouped at one time. To restore a column heading, drag and drop back to the column headings area. To hide this feature, right click in the drop zone and select ‘Hide Group by Box’.
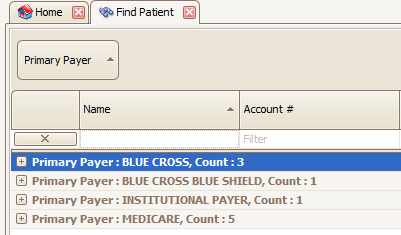
Note that the program will show a count of the number of rows within a group:
Sort – Click the column heading to sort A-Z and click again to sort Z-A. To sort more than one column, hold the Shift key and click additional column headings.

 Indicates the
column is sorted A to Z
 Indicates the
column is sorted Z to A
Reorder – Drag and drop a column heading to change the column order.

Resize – Click and drag the column separation bar to resize the column.

Filter – Click the  icon (available when the mouse is
hovering over the column heading) to bring up the filters list. Filtering
is also possible from the filter row.

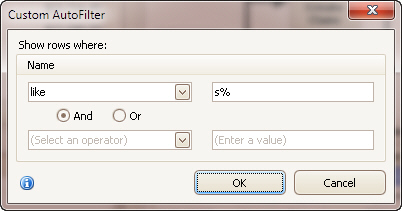
Advanced Filtering – By clicking the filter icon  , you can select ‘(Custom)’ to open the
advanced filtering window. This allows multiple filter criteria.
For text columns (such as name or account number columns), the % is used as a wild card. Entering s%l would match ‘Sim, Abigail’, ‘Strick, Darryl’, and ‘Sums, Manuel’
Filter Editor – Right click any of the column headings and select ‘Filter Editor’. The filter editor allows additional filter capabilities.
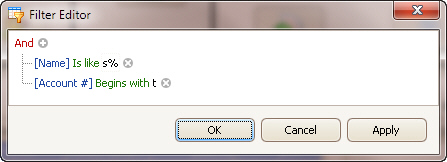
Printed – Right click any of the column headings and select ‘Print Grid.’ The program will print ALL the data in the grid (even the data you need to scroll down to see).

If the grid has been filtered, only the filtered data will be printed.

Vertical grids are used to show a single set of information. Examples of this would be on the claim screen. There is a vertical grid that contains the claim details.
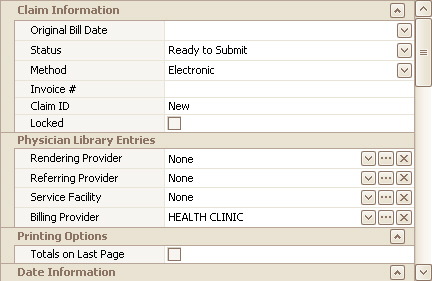
Vertical grids can be customized as well. Each row can be repositioned or fields can be added or removed.
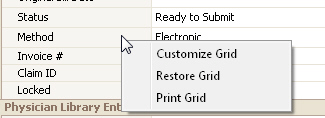
Right click the grid and select Customize Grid.
As you drag fields around the grid. Two different icons will appear to help you place the fields in the correct location.
This icon:  will place
the field in line with the rest of the fields.
This icon:  will
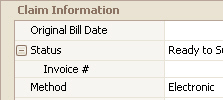
place the field indented to the field above (as shown below). Notice how
the Invoice # field is indented below the Status field.
Moving fields around a vertical grid can get tricky. Remember you can always restore the grid to its original format by right clicking and selecting ‘Restore Grid’.
Most grids can conditionally format the cell based on the data. For example, you may have patients with a balance greater than $50 show up red.
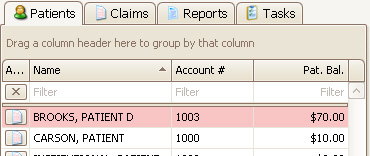
To set the formatting rules, right click the column heading and select Conditional Formatting.

Follow the onscreen prompts to set your criteria. There are many different possibilities including icons, gradients, and data bars.