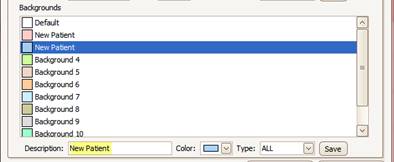
Appointment Borders and Backgrounds affect the appearance of the appointments. Assigning ‘Borders and Backgrounds’ will assist with quick recognition of various appointment types when viewing the scheduling calendar. Backgrounds and Borders may be customized at any time.

1. Select a background color and rename it to your office preference. Ex: A color may be selected to signify a ‘New Patient’ when entered in the scheduler.
2. Use the color drop-down selector if you would like to change the color.
3. Click on ‘Save’ button.
Note: Backgrounds and Borders cannot be deleted, only the name and color can be changed.