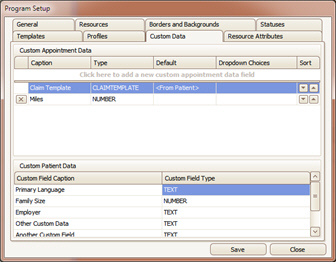
Scheduler allows for setting up custom fields for both ‘Appointment’ and’ Patient’ data.
1. Enter Name to be used for the data field.
2. Enter data ‘Type’ from drop-down selections.
3. Optional: Default information.
4. Optional: If ‘Type’ selected was ‘Checked – Dropdown’ or ’Dropdown’, enter Dropdown Choices.
5. Click ‘Save’
Note: To view ‘Custom Appointment Data’, right click on an appointment and select ‘Open’.
1. Enter Name to be used for the data field.
2. Click in the ‘Custom Field Type’ and using the drop-down, select field ‘Type’.

To view custom fields, go to ‘New’ or ‘Edit’ a Patient record.
