
The ‘Bill To’ dropdown reflects the payers associated with the patient record. The text of the selected ‘Bill To’ will contain information, ex: (1/2), to indicate Primary and/or Secondary payers associated with the claim.
On the Claim screen, click the  button to open the Insured’s
information.
button to open the Insured’s
information.

Edit Insured’s information and click on ‘Save’.
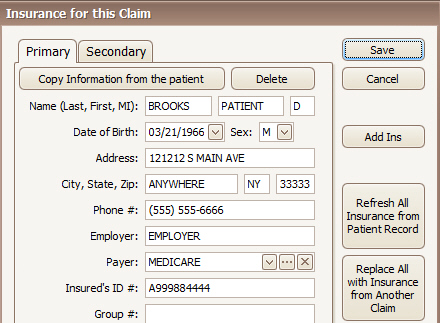
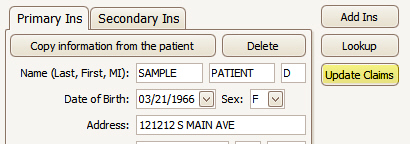
To edit Insured information for multiple claims for a specific patient, go to the Patient Information screen, edit insurance information, and click on ‘Update Claims’.

The program will automatically change the ‘Bill To’ based on service line responsible parties.
Examples:
|
Current Bill To |
New RP for Service Line 1 |
New RP for Service Line 2 |
New Bill To |
|
Primary |
Secondary |
Secondary |
Secondary |
|
Primary |
Primary |
Secondary |
Primary (no change since primary has a higher priority than secondary) |
|
Primary |
Patient |
Secondary |
Secondary (switched to secondary because secondary has a higher priority than patient) |
|
Patient |
Secondary |
Secondary |
Patient (no change because Patient is further down the chain than secondary) |
|
Primary |
Patient |
Patient |
Patient (notice it skipped the secondary) |
If the claim ‘Bill To’ setting changes to a Secondary or Tertiary payer, the program will reset the status to ‘Ready to Submit’ and re-queue it on the ‘Send Claims’ window. The status will remain at ‘Submitted’ when you change the ‘Bill To’ to ‘Patient.’
If the payer listed as the ‘Bill To’ has the ‘Automatically Forwards Claims’ option checked in the Payer Library, the Claim Status will not change. This prevents claims from being re-queued on the ‘Send Claims’ window. This is useful when the Primary Payer (usually Medicare) forwards claims to the Secondary Payer on your behalf -- and in certain billing situations where claims Processed as Primary require no further action on your part.
When auto-posting, if the 835 Claim Status indicates ‘Forwarded to Additional Payers’ then the status will remain at Submitted.
Claim information Grids displays all ‘Physician Library’ information along with additional Claim information. Not all fields are required and Grid categories may be customized to add additional fields.
Click on expander arrows to open Claim categories. Right click the grid and select ‘Customize Grid’ to add additional rows.
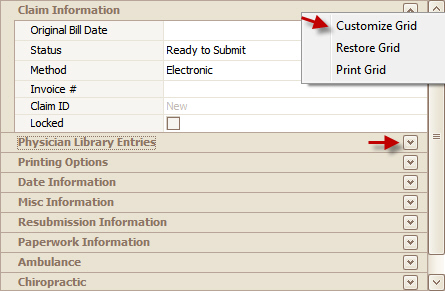
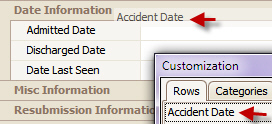
Drag and Drop additional row information to Category location. ‘Accident Date’ would be dropped under the ‘Date Information’ category.
To remove a row, open the Customization box, drag and drop the row back to Customization dialog box.
Additional ‘Categories’ may be added to the Grid. To add a customized Category, click on ‘New’.

Enter new Category name. Drag and drop to grid.

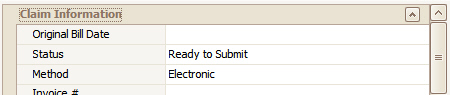
The Claim Status on new claims is automatically set to ‘Ready to Submit.’ Once the claim has been Exported or Printed, the claim status changes to ‘Submitted.’
If authorizations are available for a Patient/Payer selection, the program will notify you on the charges screen. It is up to the user to select the correct authorization. See Authorization for more information.
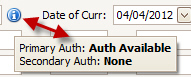
There is an informational Icon to the right of the authorization selector.

If the icon is ‘blue’ it indicates that there is a claim insurance that has an authorization available, but does not have any authorization number assigned, otherwise, the icon is ‘gray’.
Hovering over the icon shows a summary of the claims’ authorization information.
To select the Authorization number, click on the  button. To open the Authorization
Library click on the
button. To open the Authorization
Library click on the  button.
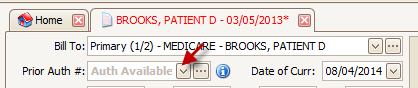

If an authorization is not showing, be sure the authorizing payer (set in the authorization library) matches the bill to payer.
The list will only show authorizations that have units and/or dollars remaining and is not marked as ‘hidden’. ‘Show’ button at the Authorization Library level indicates a ‘hidden’ authorization. If you have used up all the available units, the auth will not appear in this list.
When selecting an authorization, if the <No Template> option is being used to create the claim, the auth’s procedure code will be added to the ‘preview’ line.
When selecting an authorization, if the Claim Template is set to ‘<No Template>’, the program will pre-fill the service line preview row with the procedure code, modifier(s), and any other information such as charges from the procedure code library. NOTE: This works only if the template is set to ‘<No Template>’.

Premier performs three authorization checks when saving a claim.
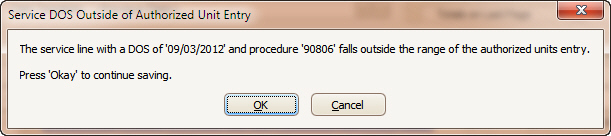
Dates between the start and end date. If outside the date range, the following message will appear.
Unit count is lower than Units Allowed. If unit count is higher than allowed, the following message will appear.

Total dollar amount below the Dollars Allowed. The program first checks for the service line allowed amount value. If the allowed amount value is $0.00 then it will use the charge amount to determine if a warning should be shown.
If submitting claims electronically, up to 12 diagnosis codes may be entered.

When the mouse is hovering over a diagnosis field, the description from the code library will appear. If a description does not appear, make sure the code is entered properly in the library.

On the Service line, in the Diag. # field, enter the number (or numbers) “pointing” to the pertinent diagnosis or diagnoses associated with that procedure code. All diagnosis codes entered on the claim must have a corresponding number on a service line. Billing guidelines permit a maximum of 4 diagnosis pointers per service line. For Diagnoses J10, K11, and L12, use letters only (J, K, L) in the Diag. # field.

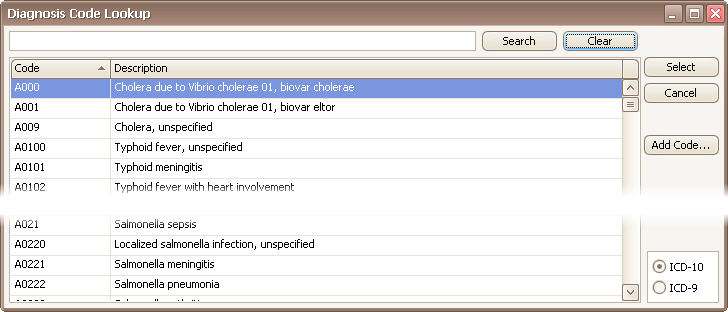
Double click a diagnosis field to open the lookup library list. Use the ICD selector to change between the ICD-9 and ICD-10 code sets.
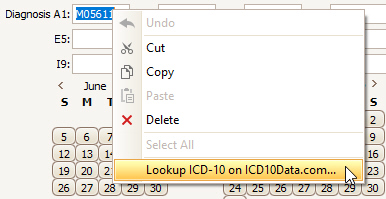
Another option is to use the ICD10Data.com web site to lookup codes -- https://www.icd10data.com/
This is a popular (and free!) resource that you can access right from your EZClaim program.
Simply right click the diagnosis field and select ‘Lookup ICD-10 on ICD10Data.com’
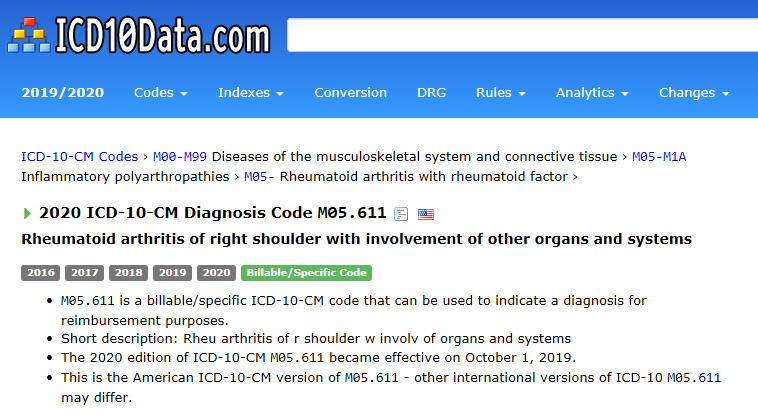
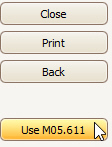
Once a code has been found, click the ‘Use’ button.
Add Code…
The Add Code button allows you to quickly add a code to a code library without opening the full library.
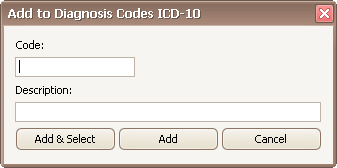
Enter the code and description then click Add & Select or just Add.