 Home > Create
Claim
Home > Create
Claim Home > Create
Claim
1.
To quickly open a new claim, click on the Claim button  next to a Patient’s name in the search
pane.
next to a Patient’s name in the search
pane.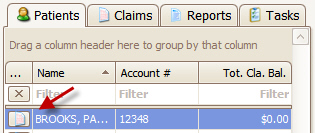
OR
Click ‘Claim’
button on Ribbon menu bar or ‘Create Claim’ from the Home screen. Click the
‘Select’ button beside the patient to add a claim. 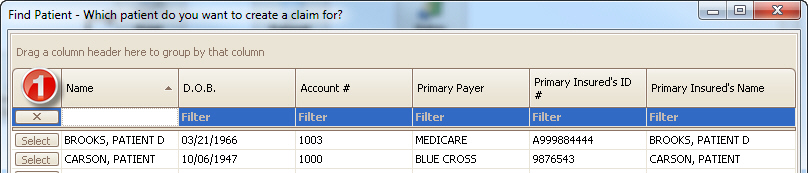
This will open the claim screen and allow you to enter the services lines and any additional claim data.
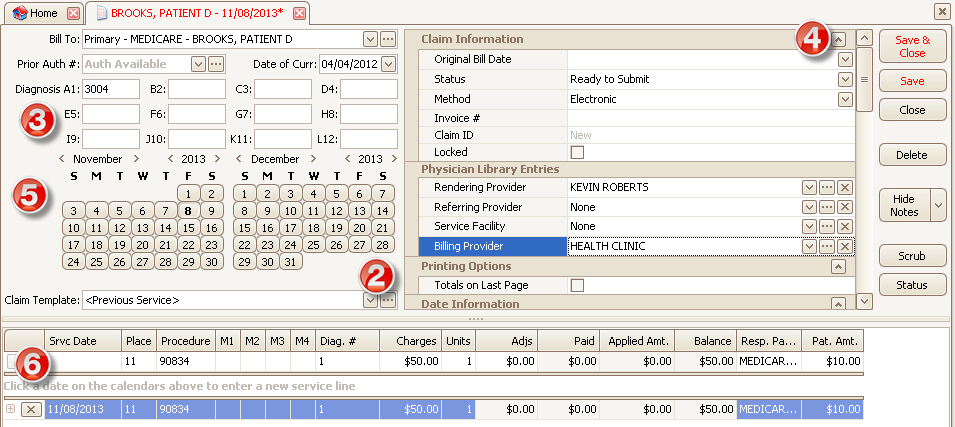
2. Optional: Select ‘Previous Claim,’ ‘Previous Service’ or a previously created custom template.
3. Enter Diagnosis codes if they had not been previously entered on the Patient Information screen.
4.
Expand grids by clicking on the expander button  to confirm additional information. To
Edit claim information in the grid, click in the field to view additional
options.
to confirm additional information. To
Edit claim information in the grid, click in the field to view additional
options.

Note: DME claims will need to select an Ordering Provider. See Claim Information Grid, for adding the ‘Ordering Provider’ row under the ‘Physician Library Entries’ category.
5. To quickly enter service line dates, click on a Date on the calendar. Dates may also be entered manually.
6. Required - Place of Service, must use 2 digits: below are the most commonly used values. Contact your Payer for additional codes.
11 - Office
12 - Home
21 - Inpatient Hospital
22 - Outpatient Hospital
23 - Emergency Room - Hospital
24 - Ambulatory Surgical Center
53 - Community Mental Health Center
81 – Independent Laboratory
99 – Other Unlisted Facility
7. Enter the diagnosis code line number (POINTER) on the charges line. Do not use the actual diagnosis code in this box, only pointers. Enter no more than four DX pointers on each service line.
8. Continue entering required data in Service Line.
Note: For additional Claim information see Claim.