 Home tab >
Payer
Home tab >
Payer Home tab >
Payer
‘Payer Library’ data must be entered before entering ‘Physician Library’ data. See Payer Library for more information.
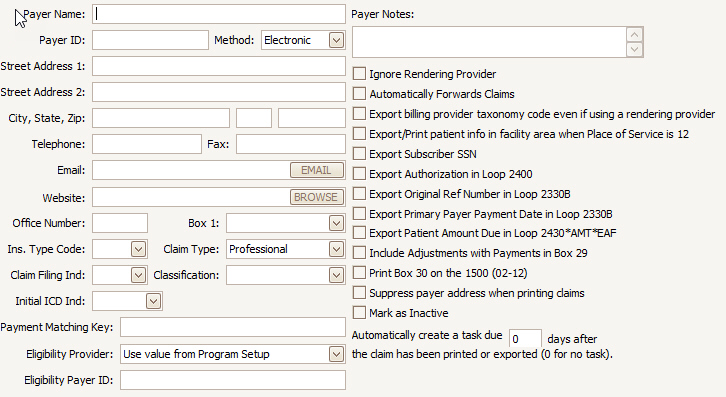
1. Enter Payer Name and Payer Address information in the pertinent fields.
2. Enter Payer ID if submitting claims electronically. Confirm the correct Payer ID by checking the payer list provided by your clearinghouse. If you submit claims directly to Payers, contact them to obtain the expected Payer ID. Valid payer IDs are crucial in directing your claims to the appropriate electronic mailbox/destination.
3. Select ‘Method’, Electronic or Paper.
4. Enter ‘Ins. Type Code’ ONLY if you will be submitting Medicare Secondary Claims. NOTE: An ‘Insurance Type Code Override” field is available at the claim grid level if you occasionally need to override the default Ins. Type Code. For example, many claims may require ‘47’ as the Ins. Type Code, whereas only a few claims may require ‘12’ instead.
5. Select ‘Claim Filing Indicator’ if submitting electronic claims.
6. ‘Claim Type’ is visible/available for clients sending both Professional and Institutional claims. Institutional activation code must be entered under Libraries > Add-On Services. Please contact EZClaim to obtain this activation code.
7. The ‘Payment Matching Key’ field allows the program to consider multiple payers equivalent to each other from a posting / payment entry perspective. For example, a user may enter ‘BLUE’ for various Blue Cross Blue Shield entities. All Payer Library entries thus labeled as ‘BLUE’ will be treated as if they were the same payer for auto-posting purposes. Payment Matching Key may be updated in bulk at the ‘Find Payer’ window by right clicking the payers you wish to edit.
8. All other fields are ‘Optional’.
9. After confirming accurate and complete payer information, click one of the ‘Save’ buttons.
To edit Payer information once it has been entered, highlight the Payer, edit Payer information, then click one of the ‘Save’ buttons.
Keywords: Find and replace, find/replace, merge
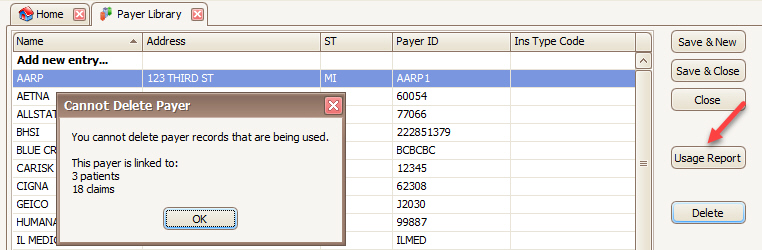
You will note that the program does not allow you to delete Payer Library entries that are already in use. Click the ‘Usage Report” button to see an itemized list of patients and claims.
You can conveniently “relabel” payers as needed by opening “Find and Replace for Payer Library.” Your first step is to identify the preferred library entry. Next, select one of the obsolete entries in the ‘Find Payer’ field and select the preferred entry in the ‘replace with’ field.
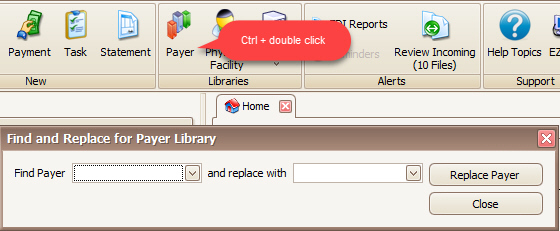
Once the obsolete entry is no longer associated with any patients or claims, you will be able to delete it from your program.