 Home tab >
Physician Facility
Home tab >
Physician Facility Home tab >
Physician Facility
Physician/Facility Library information must be entered before entering Patient data. Once entries are set up in the Library, they will be selectable on Premier data entry screens. Setting up Physician Library data correctly is vital for error-free claim submissions.
Classification - The ‘Classification’ determines in which Premier drop-down list the name will appear. For example, if you select ‘Billing’ as classification, the name will be displayed when selecting ‘Billing Provider’ information.
What is Rate Class? Rendering providers can be assigned a ‘Rate Class’ which is used in conjunction with the Procedure Code Library. Rate Class identifiers previously set up in the Procedure Code library will be displayed in the ‘Rate Class’ drop-down box. (See Procedure Code Library for setting up a ‘Rate Class’ in the Procedure Code Library).

When using the Procedure Code Library to enter code data on a claim, the code list will be filtered based on the ‘Rate Class’ of the claim’s Rendering provider.
NPI numbers - NPI number format will be validated during data entry. If the number looks invalid, a Tool Tip message will appear warning you of an invalid NPI number. The warning does not prevent saving the library entry.
To find the NPI number of an
entry, click on the Lookup NPI link next to the NPI field.  .
.
Additional ID Numbers - To enter Additional ID
Numbers, select a Payer, press the tab key  , select the type of ID from the list, press
the tab key, enter the ID number, then press the tab key to save the entry.
, select the type of ID from the list, press
the tab key, enter the ID number, then press the tab key to save the entry.

To hide a Library entry, mark the entry as ‘Inactive’.
 Do not delete the entry if
being used on patient or claim records.
Do not delete the entry if
being used on patient or claim records.
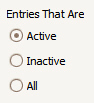
To view Inactive entries, select ‘All’ or ‘Inactive’ from the filter list.
1. Enter the Display Name of Provider, Agency or Business Name.
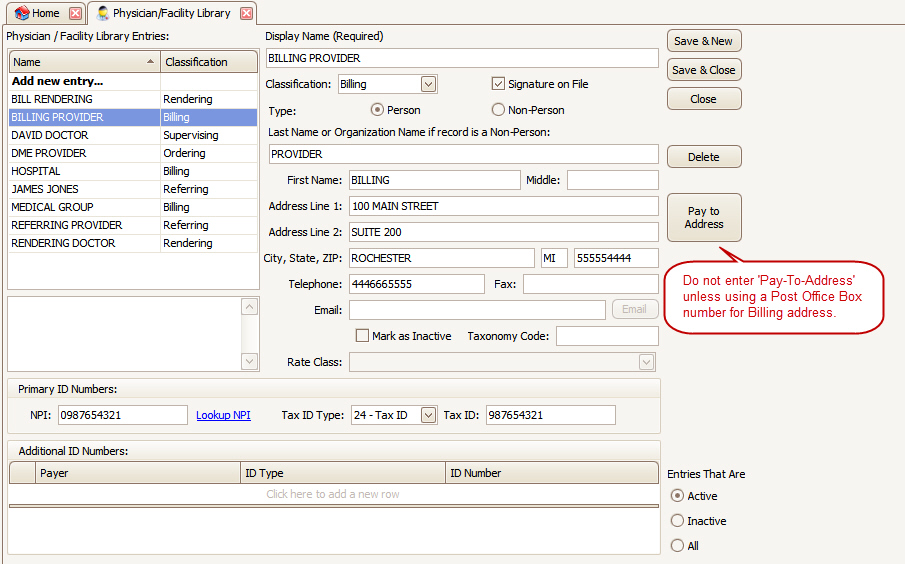
2. Select ‘Billing’ as Classification. The Classification determines in which drop-down list the name will appear when entering claim data. Note: If submitting an electronic ANSI 837 file, do not enter a PO Box number for Billing Provider information. Enter Physical Address and then click on the ‘Pay-to-Address’ button to enter PO Box information.
3. Check ‘Signature on File’.
4. Select ‘Type’ as ‘Person’ OR ‘Non-Person’ (if an Organization).
5. Enter Last Name (if Person) or Organization name (if Non-Person).
6. Enter First Name.
7. Enter Address information and 9-digit zip code.
8. Enter ‘Individual’ or ‘Organizational NPI’ number, use ‘Lookup NPI’ if needed. Select Tax ID Type, enter Tax ID.
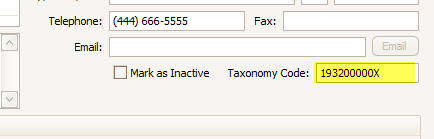
9. Situational: Enter Taxonomy Code only if required by your Payer.
For electronic claims (Loop 2000A PRV) use the Taxonomy Code field:
For paper claims (Box 33B) use the Additional ID fields:
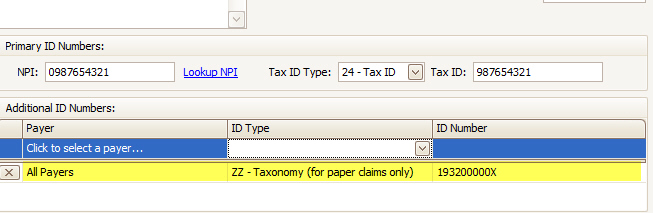
10. If required by your Payer, enter ‘Additional ID Numbers’ by clicking in the blank line.
11. Click on
one of the ‘Save’ buttons.
Continue entering additional Provider/Facility information.
•Rendering – Last name, First name and NPI number.
Situational: Enter Taxonomy Code only if required by your payer.
For electronic claims (Loop 2310B PRV) use the Taxonomy Code field:
For paper claims (Box 24J shaded area) use the Additional ID fields:
•Facility – Name, Address and 9-digit zip code. NPI if required.
•Referring – Last name, First name and NPI number.
•Ordering – Last name, First name, NPI ‘and or’ full physical address. (Payer specific)
•Supervising – Last name, First name and NPI number.