1.
Click the Enter Payment button on the home screen.
2.
Select a Payment Source. If the payment came from the Insurance company,
select Payer. If the payment came from the patient, select
Patient.
3.
Select the payer or patient. Once selected, the program will load all
service lines with a balance associated with the payer or patient.
You may find it necessary to adjust your filter settings if the program does not list the service lines you are expecting. For example, by default, $0.00 service lines are not included in the grid but can be added via the filter settings:

4.
Enter the payment details such as check amount, date, method and reference
information. 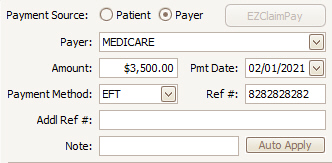
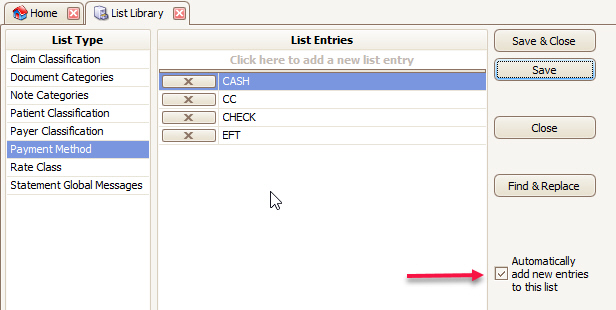
5. Payment methods can be added/updated in bulk in the List Library (Home > Libraries > List > Payment Method. New entries entered on the Enter Payment window will be automatically stored unless the box below is unchecked.
6.
In the apply payment grid, enter the dollar amount to apply to the service
lines. You can also enter adjustment amounts.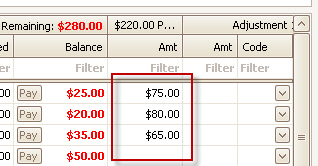
7. When the remaining balance is $0.00, you know you have applied the full payment amount.
8. Save and Close the payment when finished.
Adjustments may be entered at the same time payment information is added. The program will remember the group code and reason code for the Adjustment 1 column. This typically helps with data entry since a contract adjustment is normally included with every payment. To turn this feature off, change the options in the Payment Options section of Program Setup. See Payment for more information.
In earlier versions of the program, the PR logic was to export all patient responsibility codes into a single PR2, even if there was no PR2 adjudicated and even if there were multiple PR codes adjudicated. In 2021, certain payers (notably Medicaid) required the unbundling of PR codes in electronic secondary claims. The following solution, NEW in release 671, allows you to easily unbundle the PR codes during MANUAL payment entry. See Additional Options for info on how to unbundle PR adjustments during 835 posting.
Solution
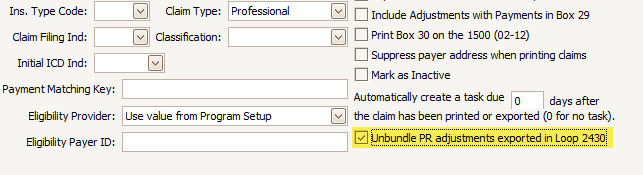
•Added a payer option to 'Unbundle PR adjustments exported in Loop 2430'
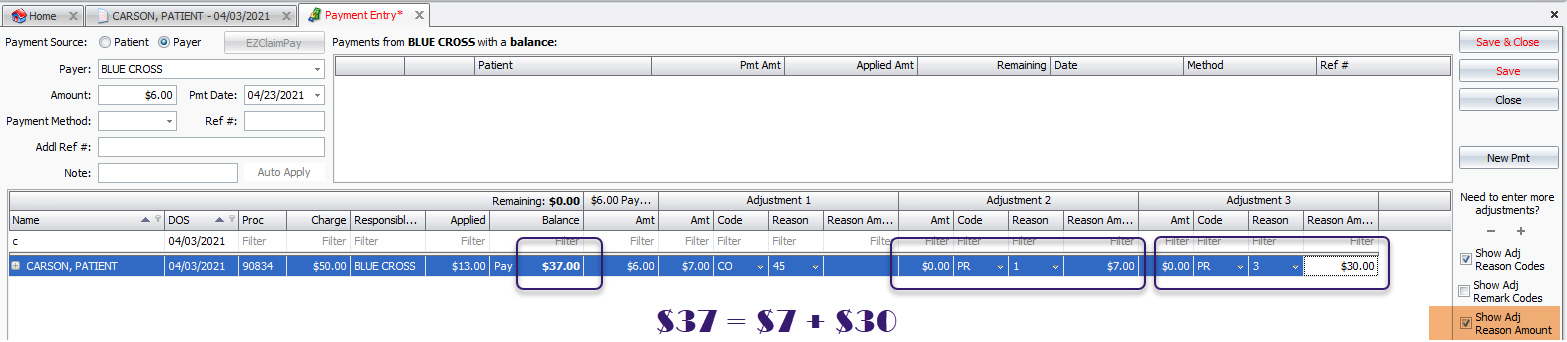
•Added a new service line level column called 'Reason Amount'
o Used to report dollar amount assigned by payer to each Reason code
o Does not affect service line balance
How to use with manual Payment Entry
•Click Show Adj Reason Amount in Payment Entry.
•Fill in the amount assigned to each PR Reason in the Reason Amount column.
•The tracked PR Reason Amounts must equal the service line balance in order to unbundle. If not, Premier will bundle the PRs together.
•Reason Amounts on CO, OA, and other adjustments have no effect.
•Bill-To Payer must have the unbundled option checked in the Payer Library.
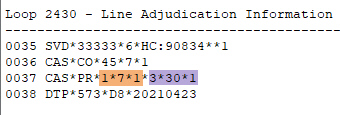
UNBUNDLED secondary 837 generation
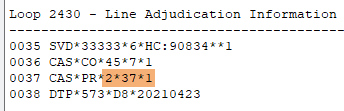
BUNDLED secondary 837 generation for comparison
1. Open Payment Entry and select Patient as Source. (The EZClaimPay button will be inactive if Payer is selected as Source.)
2. Select the patient.
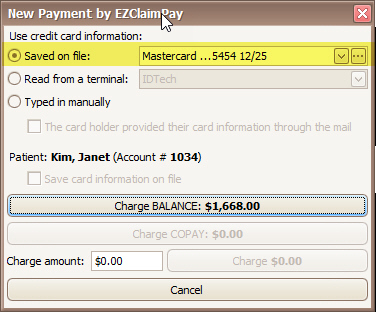
3. Click the EZClaimPay button.
4. Enter amount of new payment.
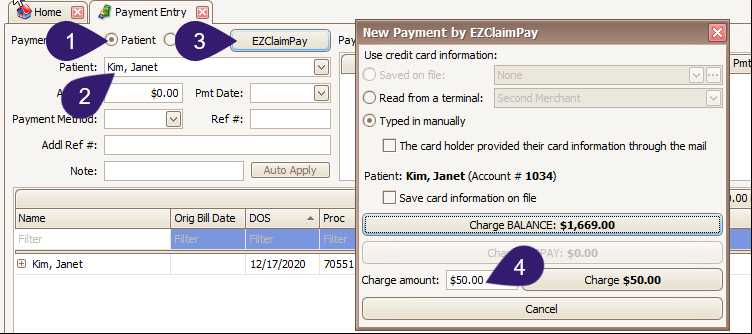
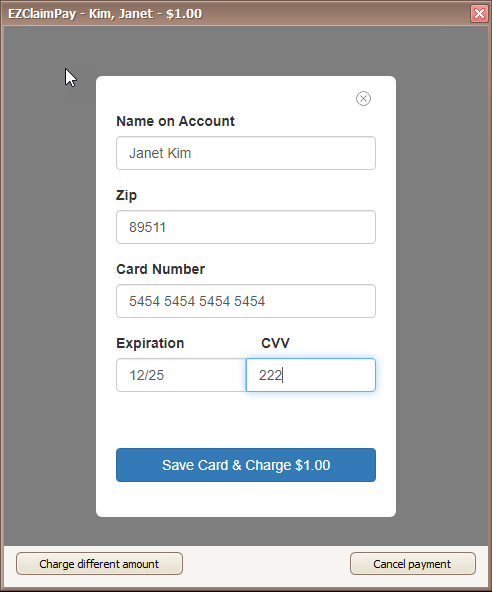
5. Hit the ‘Enter’ key or click one of the ‘Charge $X’ buttons. This window appears next.
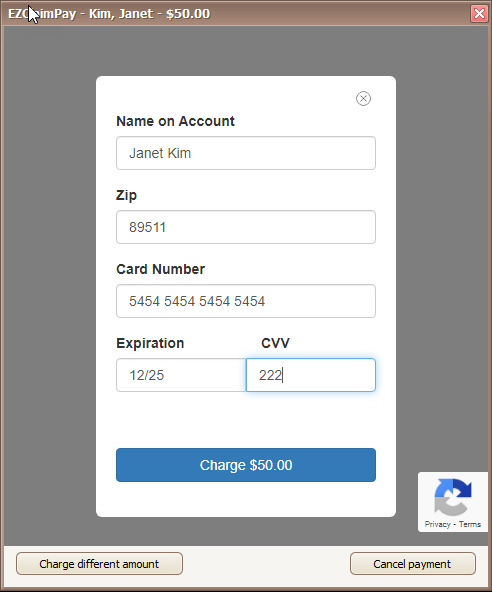
6. Enter card details and hit the ‘Charge’ button.
7. Complete Captcha if required.
8. If the payment is successful, you will be returned to the ‘Payment Entry’ screen where you can proceed to disburse this newly captured payment amount.
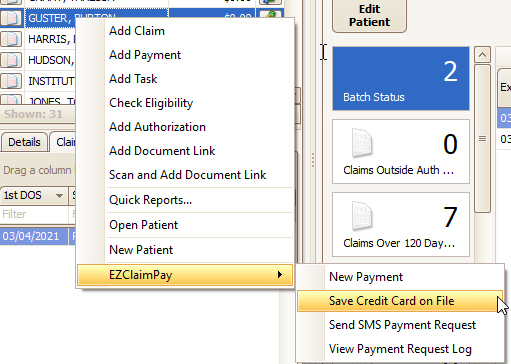
Users now have the option to save credit card information to a specific patient.
Right click on the patient’s name, hover over EZClaimPay, and select ‘Save Credit Card on File’. This menu is available from the Quick Access pane, the Find Patient grid, and the Appointments grid.
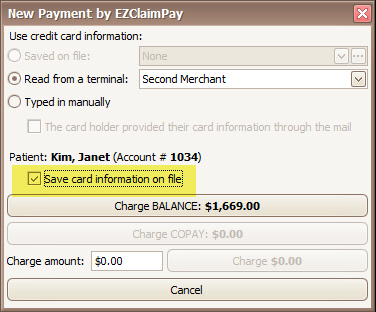
This option is also available during the new payment process.
To save credit card information to a patient, open the ‘New Payment by EZClaimPay’ window and select the 'Save card information on file' checkbox, then process a payment. The credit card will be available for use for all subsequent payments for that patient. Cards can be saved using a terminal device or by typing in the card information manually.
Once a credit card has been saved, it becomes the default selection when creating a new payment for that patient.
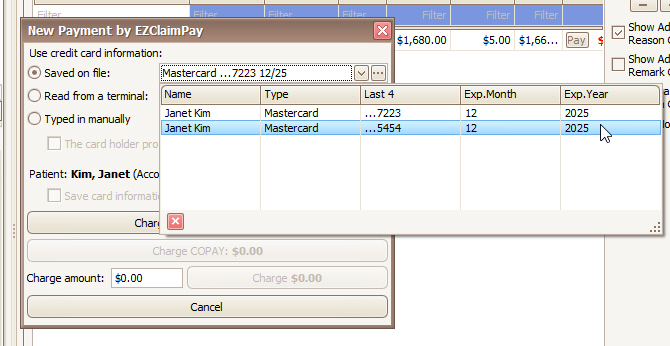
Multiple credit cards can be saved at the same time. Click the drop-down to select which card to use.
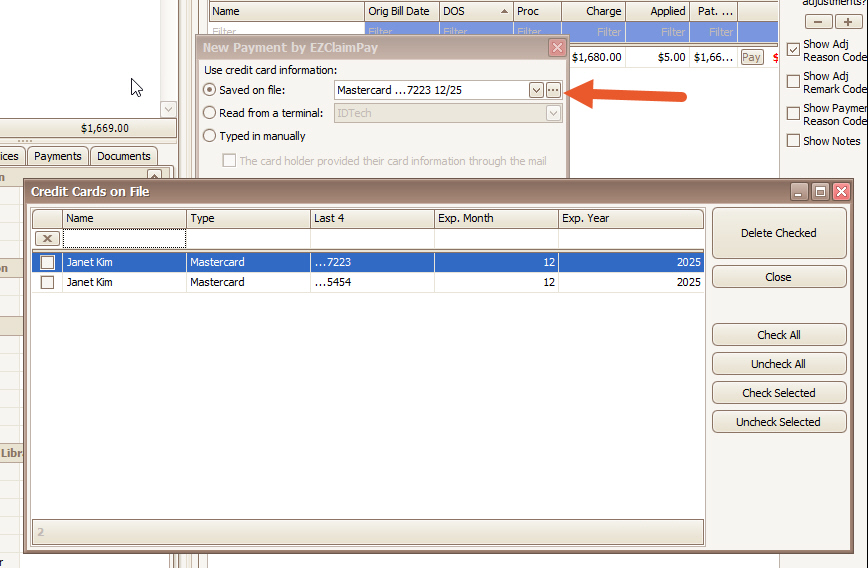
Click on the ellipsis button to delete a saved card.
1. Open the payment in Payment Modification.
2. Click Void/Refund EZClaimPay.
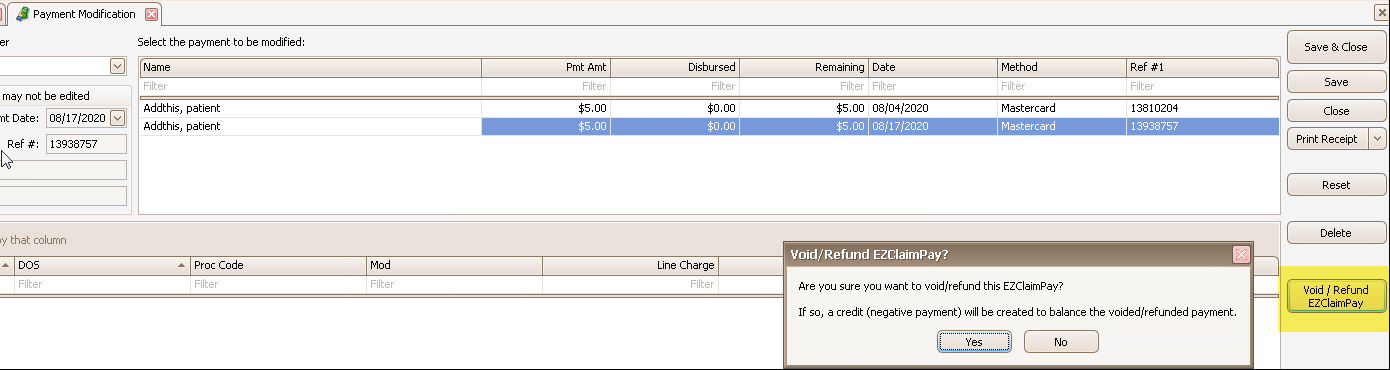
•The EZClaimPay receipt (see below) will show the void/refund if it’s used
•Void = cancels a payment made on the same day. Creates a transaction with the same Ref #1 as the original payment.
•Refund = cancels a payment made on a previous day. Creates a transaction with a unique Ref #1.
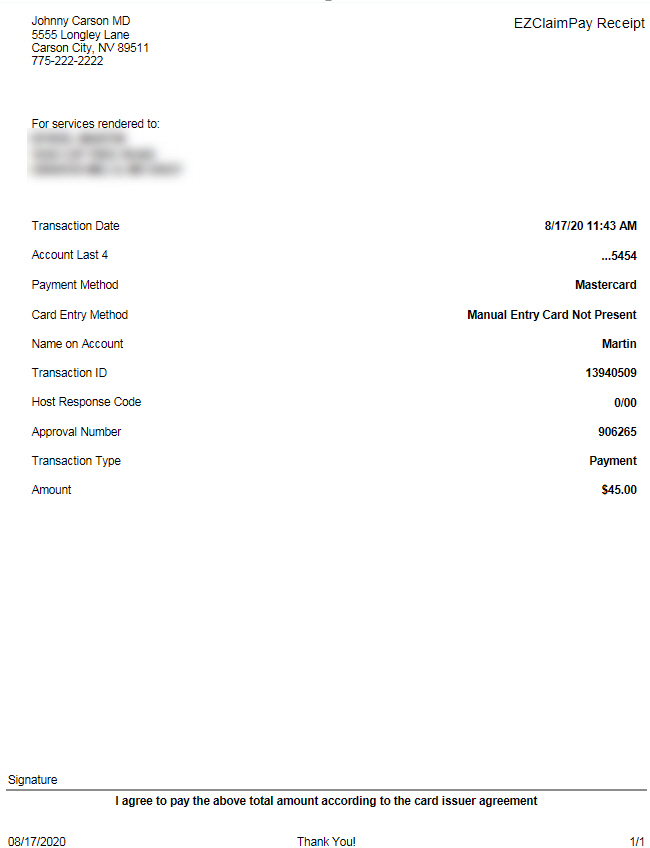
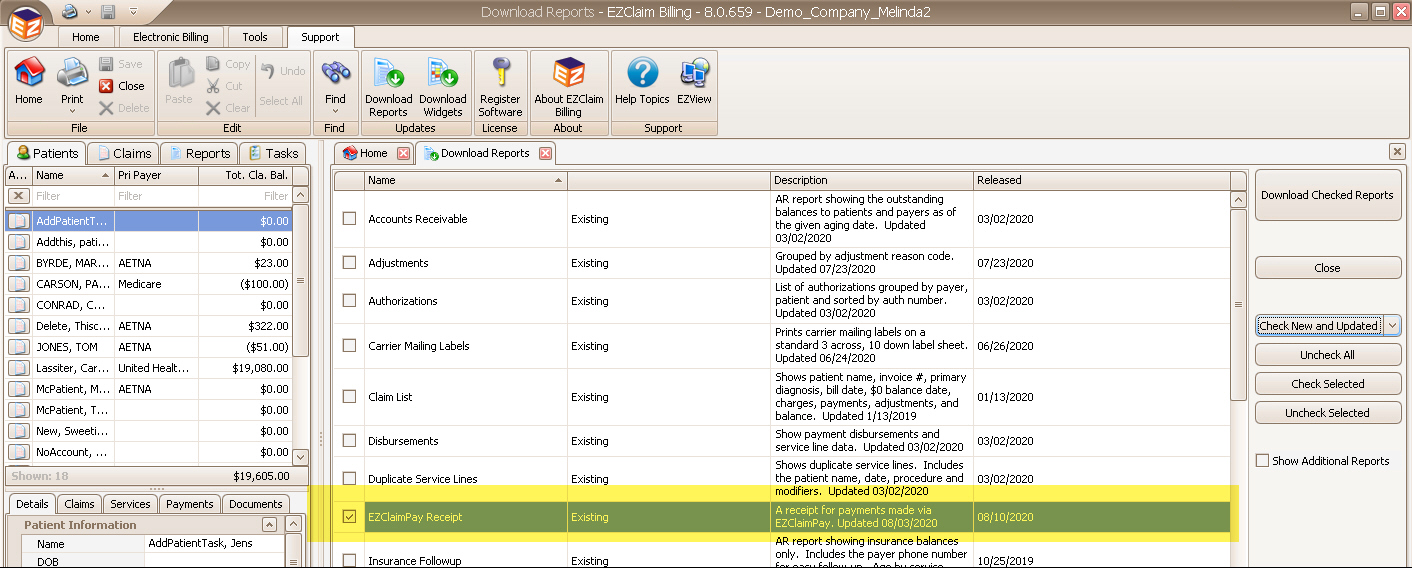
An EZClaimPay Receipt report is available but not required for use. This receipt meets Fullsteam’s compliance requirements.
First, download this report as follows:
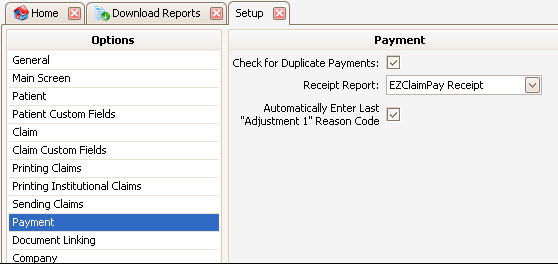
Next, activate it under Program Setup:
Sample EZClaimPay Receipt report: