 Home Screen
 Home Screen
YouTube video: EZClaim Statements
Statements are run by clicking the ‘Patient Statements’ button on the home screen or ‘Statement’ on the Home Ribbon bar.
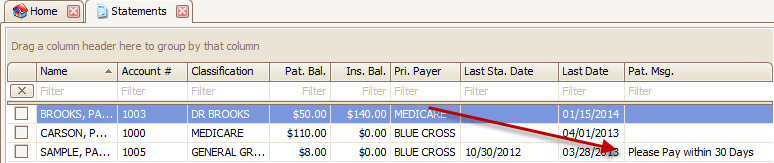
When the ‘Statement’ window opens, the grid will show a list of patients that have a balance greater than $0.01. If a patient name is expected but unavailable on this list, you may need to adjust your filter criteria as follows. In situations where the patient has a credit instead of a balance, or where a patient payment has been entered but not yet disbursed, you may need to enter a fairly large dollar amount in Min. Pat. Bal. preceded by a minus sign. The negative balance will display in parentheses. Don’t forget to click the Refresh button after making your changes.
If you wish to generate a patient statement before the Primary or Secondary Ins has been billed, you can add the Pat. Amt. Due field (available in the Column/Band Chooser if not already present) to the service line and populate it with the expected copay amount.


Various statement formats are available.
Statement – Standard plain paper statement.
Nelco – Statement format to use with Nelco perforated statement paper. Visit http://www.nelcosolutions.com/ezclaim/ to order Nelco statement paper.
BillFlash – Used to send electronic statements to the BillFlash service. Visit http://www.BillFlash.com for more information.
TriZetto – Used to send electronic statements to TriZetto. Visit http://www.trizettoprovider.com/ for more information.
Note: BillFlash Options are set in the Add-On Library under Libraries Icon>Add-On Services> Electronic Statements by BillFlash. See Add-On Services for additional BillFlash information.
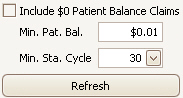
Minimum Patient Balance – Used to filter out patients that do not owe anything. May also be used to prevent statements going out to patients that owe small amounts.
Minimum Statement Cycle – Number of days since statements were last generated. In the example above, only patients for which a statement has not been generated (print or electronic) in the last 30 days will be listed. If an “expected” patient name is missing from your list, resetting the Min. Sta. Cycle to 0 will usually repopulate the patient. Other filters (see below) may need to be addressed as well.
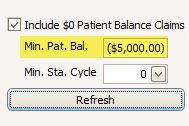
Include $0 Patient Balance Claims – This option is only valid when you set the Minimum Patient Balance to $0.00. By checking this box and setting the minimum balance to $0.00, you will see every patient in the system.
•Checked – When loading the statement grid, EZClaim will consider all claims. Some users want to send a statement to all patients regardless of their balance. In this case, they would check the box and set the minimum patient balance to $0 so the grid would list all patients.
•Unchecked – When loading the statement grid, EZClaim will consider only claims that have a patient balance. Some users will want to send a statement to a patient if there is a credit on one claim and an amount due on the other but the total patient due is $0. In this case, they would NOT check the box but set the minimum patient balance to $0. This would cause the list to include patients that have a $0 balance across all their claims.
Note: Any changes to these values are not saved until you print statements.
If you would like to send statements even if the patient does not owe anything, change the Min. Pat. Bal. to $0.00 and click Refresh.
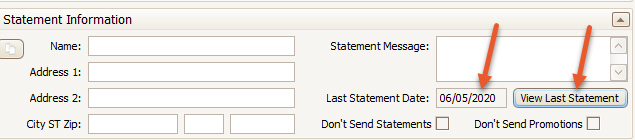
There are two levels of statement messages; patient and global. The patient message will only print on a statement to that patient. The message is viewed and/or edited in the grid under the Pat. Msg. column. You can pre-set the patient statement message on the patient record. See Statement Information for patient statement settings.
The Global Message located at the bottom of the statement screen will appear on every statement. Use the drop-down arrow to select from the message list. The list is maintained in the ‘List’ Library. See List Library for more information.

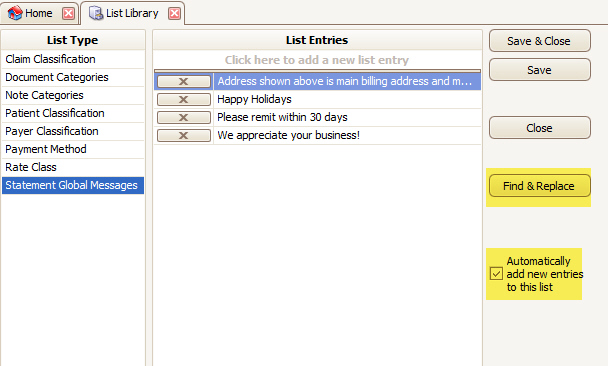
The “Automatically add new entries to this list” feature is checked by default but can be disabled if you prefer. Entries cannot be edited – instead, “Find & Replace” is available.
Note: Any changes to the ‘Global Message’ are not saved until you print statements.

After selecting statements to be printed and clicking the Print button, you will see the following pop-up message:
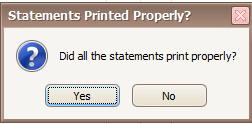
Did all the statements print properly? --If your selected statements printed correctly and you are satisfied with the results, it is very import to click the “Yes” button for internal tracking purposes – otherwise, no notation is made by the program. After clicking yes, the statement date will be recorded on the ‘Patient Information’ screen. Note: The ‘View Last Statement’ feature is available to BillFlash clients ONLY.
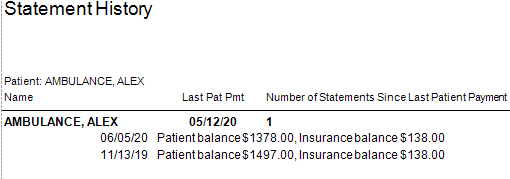
Once the statement date is on record for the patient, a ‘Statement History’ report can also be generated.
Statements may be “reprinted” by setting the minimum statement cycle down to 0. However, it is important to understand that statements always print using the latest available information. If a disbursement or adjustment was made to a claim between the first and second time a statement was printed, the changes will appear on the latest statement.